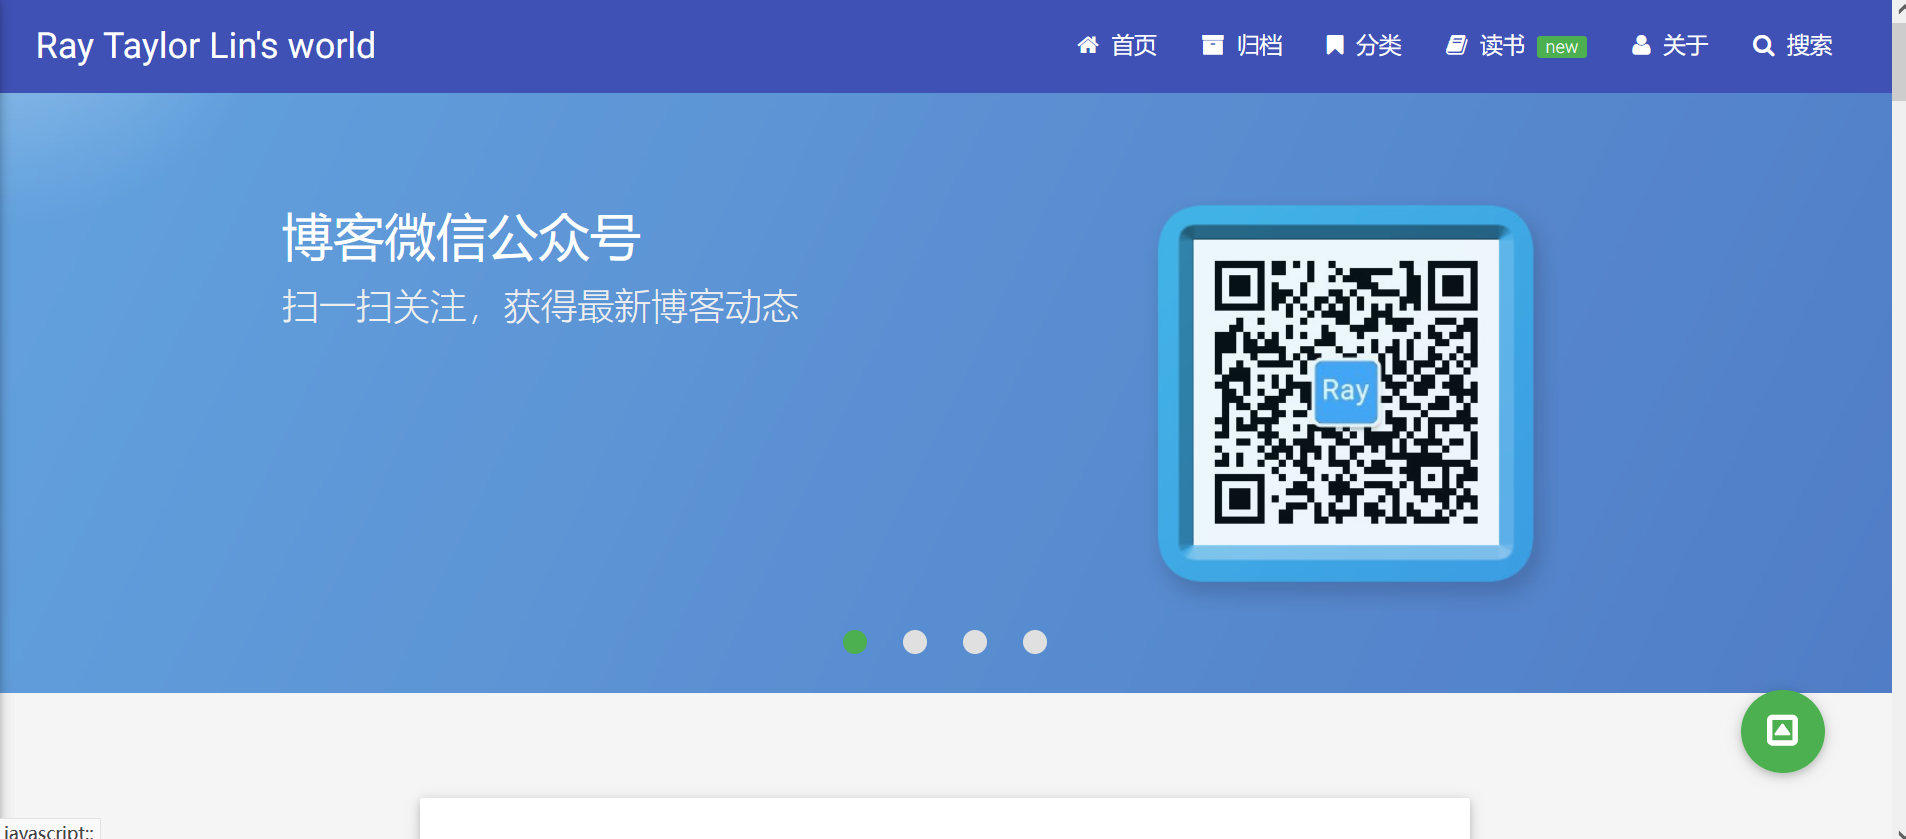
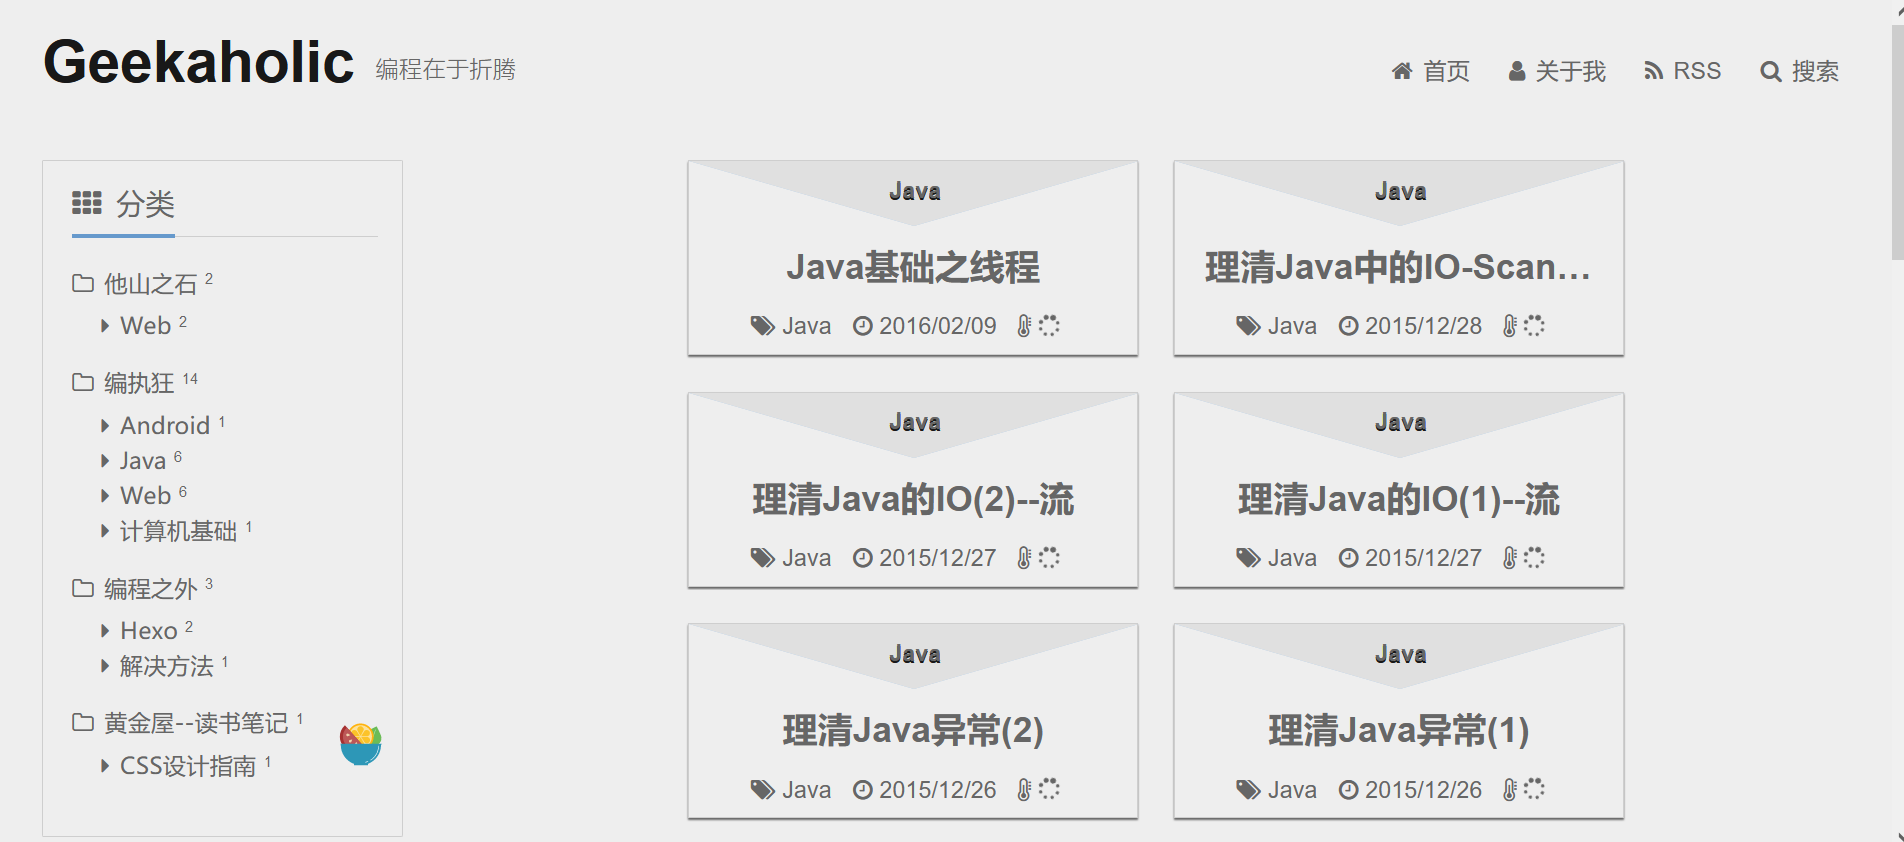
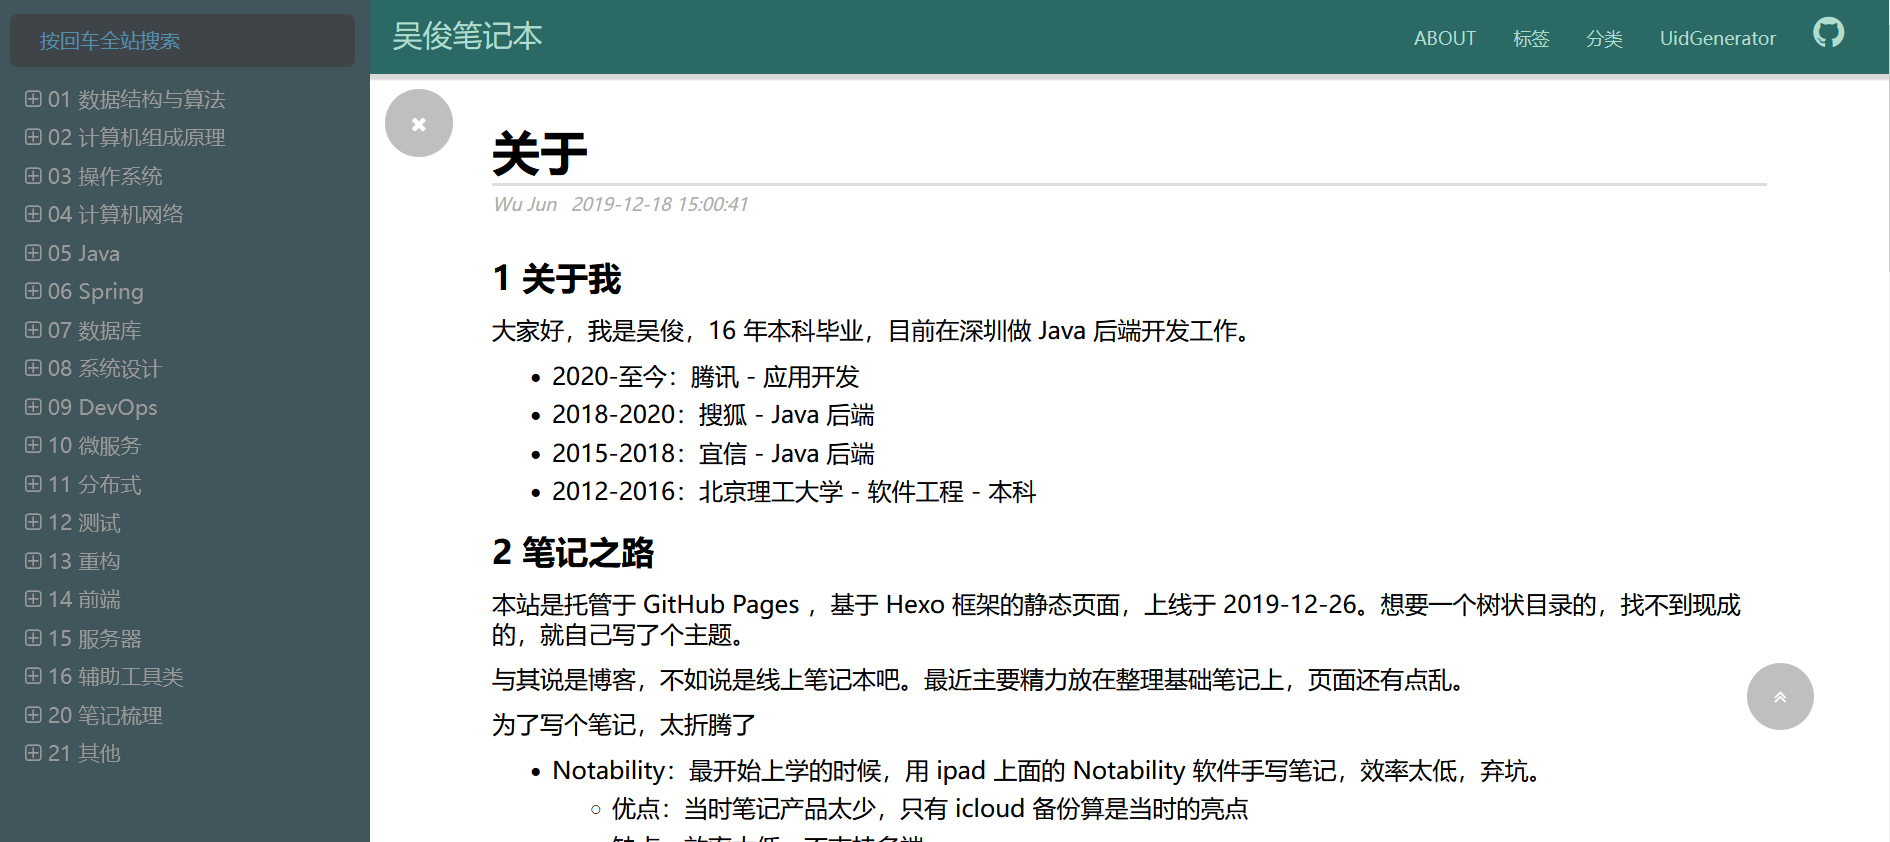
一.环境准备
环境: windows10, git, node.js
安装Hexo
npm install -g hexo
二.利用Hexo生成本地静态网站
建立本地博客
在想要创建的博客路径的上一级建立博客网站, 比如(D:pengber.github.io)用命令行进入D盘后:
$ hexo init pengber.github.io
$ cd pengber.github.io
$ npm install
安装好后, 重要的目录结构
.
├── .github         # 博客项目的全局配置文件
├── node_modules
├── scaffolds           # 模版文件夹。当 新建文章时,Hexo 会根据 scaffold 来建立文件。
├── source              # 资源文件夹
|   ├── _drafts         # 草稿文件夹
|   └── _posts          # 文章文件夹,里面为md文件,就是博客的内容, 默认有一个hello-world.md
├── themes              # 主题文件夹
├── .gitignore
├── _config.yml         # 博客项目的全局配置文件
├── package.json
├── yarn.lock
生成hexo静态网站
hexo generate
启动本地网站
hexo server
启动后显示
INFO  Validating config
INFO  Start processing
INFO  Hexo is running at http://localhost:3600/ . Press Ctrl+C to stop.
就可以访问http://localhost:3600/查看网站了
增改博客后刷新网站
如果新增了博客内容, 则需要
hexo clean		#清楚缓存
hexo generate   #重新生成网站
hexo server		#重新发布到本地
三.发布至github
注意⭐
本地文件夹是D:\pengber.github.io , 但是这个文件夹关联的是远端的pengber_site私有仓库, 而这个文件夹里面配置的是远端的pengber.github.io公开仓库, 这样保证了源文件的私有, 以及要发布文件的公共.
本地下载hexo-deployer-git插件
npm install hexo-deployer-git --save
新建pengber.github.io公共仓库
在github网页建立pengber.github.io公共仓库并初始化
git init
修改本地pengber.github.io配置
修改deploy字段下的值如下:
deploy:
  type: git
  repository: git@github.com:pengber/pengber.github.io.git
  branch: main
发布至github
每一次修改文件都需要提交改动到git后才能修改
git add.
git commit
hexo deploy
这时候就可以通过 https://pengber.github.io 来访问静态博客主页了.
四.设置图床
我本来的本地博客路径为D:\mdcreating\, 图片存储在D:\mdcreating\img\下
现在将博客移动至D:\pengber.github.io\source\_posts\mdCreating, 图片存储在D:\pic-bed\img下, 主要目的是前者为了配合 hexo 作静态博客发布, 后者不能放在_posts下面, 并且为了用github单独做图床.
选择了使用github作图床, 但是不是每复制一次图片就上传, 而是先在使用图片时, 利用typora先复制到本地, 然后定期每月30月底上传一次.
初始操作
在本地
D:\pic-bed\img执行git init git add . git commit -m "20220710"远程仓库建立
pic-bed公共仓库, 注意不要添加README.md本地执行
git remote add origin git@github.com:pengber/pic-bed.git
git branch -M main
git push -u origin main
之后的操作
设置typora的图片操作为, 使用时复制到本地路径, 本地路径为
D:\pic-bed\img每月月底在
D:\pic-bed\img将本地未上传的进行更新git add . git commit -m "日期" git push然后利用notepadd++打开
D:\pengber.github.io\source\_posts\mdCreating, 替换文件夹内的所有内容中https://raw.githubusercontent.com/pengber/pic-bed/main/img/为https://raw.githubusercontent.com/pengber/pic-bed/main/img/就可以更新本地图片为图床图片了, 但实际上不能这样更新, 因为这会更改本地的图片路径也为网络图片, 我的本意是, 本地文件是用本地图片, 然后发布到网上用网络图床路径, 所以我写了脚本, 在发布的时候替换字符串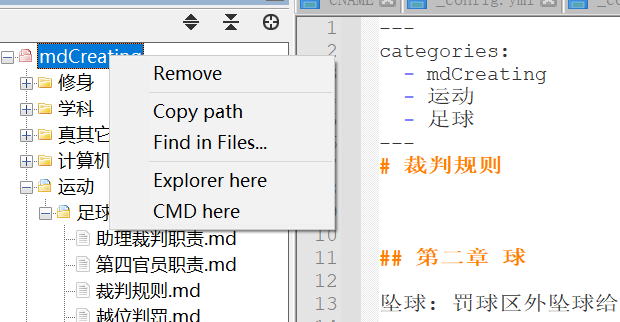
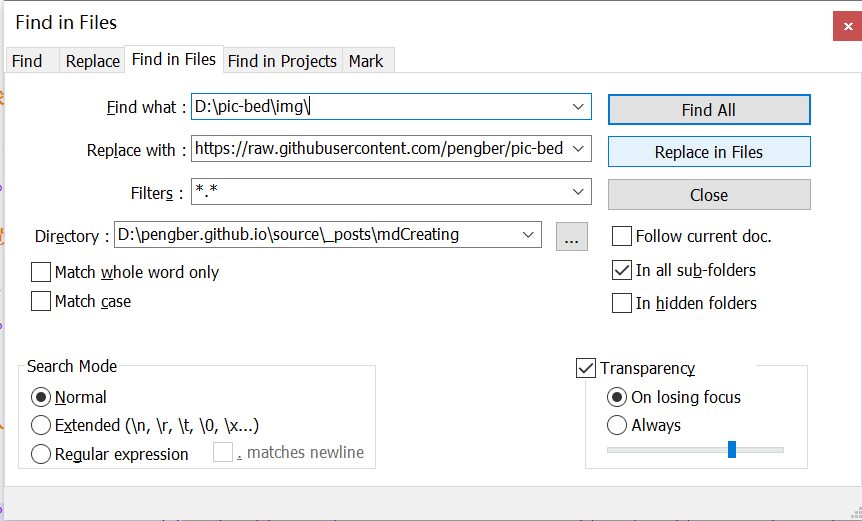
https://raw.githubusercontent.com/pengber/pic-bed/main/img/
https://raw.githubusercontent.com/pengber/pic-bed/main/img/
五.移动mdcreating到pengber.github.io下
将D:mdcreating\移动到 D:\pengber.github.io\source\_posts\mdCreating 并且对坚果云进行更改
对一些私密类的文件进行后缀的更换
六.建立域名映射到github.io
建立CNAME文件
在D:\pengber.github.io\source下建立CNAME文件, 无后缀, 并且在里面填写你的域名例如pengber.site, 注意没有http, 没有www
添加DNS解析
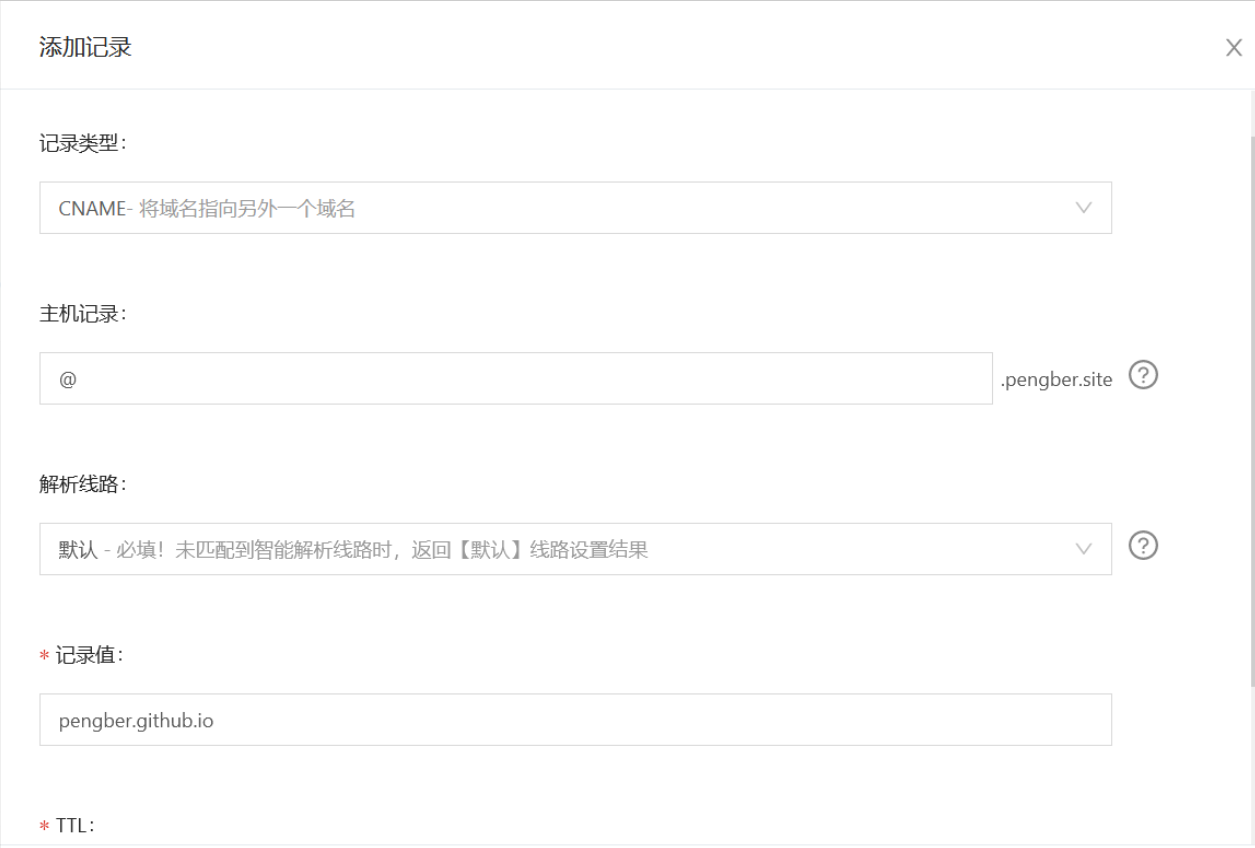
添加两条记录:
记录类型: CNAME, 主机记录: @, 记录值: pengber.github.io(注意换成你的)
记录类型: CNAME, 主机记录: www, 记录值: pengber.github.io(注意换成你的)
等待10分钟后, 就可以访问了
开启https
- 在阿里云上面申请免费证书
- 申请免费证书时需要添加一条DNS解析记录
- 批准(秒批)后再pengber.github.io 的 setting 的 pages 页面, 勾选
Enforce HTTPS.
七.设置Wiktten主题
八.安装hexo插件
wikkten主题依赖的插件
hexo-autonofollow	    // 打开非本站链接时自动开启新标签页
hexo-directory-category // 根据文章文件目录自动为文章添加分类
hexo-generator-feed	    // 生成 RSS 源
hexo-generator-json-content	// 生成全站文章 json 内容,用于全文搜索
hexo-generator-sitemap	// 生成全站站点地图 sitemap
安装命令为
$ npm i -S hexo-autonofollow hexo-directory-category hexo-generator-feed hexo-generator-json-content hexo-generator-sitemap
我自己需要的插件:
hexo-renderer-marked	//用github markdown语法渲染
hexo-blog-encrypt		//自己要写代码添加对应分类的内容为tags来添加密码
hexo-wordcount			//统计字数
hexo-permalink-pinyin	//用文章标题的拼音来生成永久链接
hexo-filter-github-emojis	//可以渲染emoji
hexo-filter-flowchart		//支持flowcharts流程图
hexo-filter-mermaid-diagrams//支持mermaid流程图
我自己还需要手写扩展的功能
文章标题形成文章目录并随页面移动
wikktten主题可以利用front-matter形成文章目录并悬浮在页面右侧. 但是是固定位置:
title: 马斯洛需求层次理论
date: 2017-02-13 13:22:49
updated: 2017-02-16 13:07:49
toc: true
tags: [生活学习]

我想要的功能是把Smart TOC拓展内嵌于我的网页.
有两种实现方案:
- 把Smart TOC移值到wikkten中
- 把wikkten的catalogue部分移值到Categories的右侧并点击按钮进行跳转, 另外将左侧bar设置成浮动窗口
- 使用3-hexo主题
九.设置hexo-theme-3-hexo主题
theme config
link:
设置成自己的linkcategory:
- width:
- lg: 200 # 1468px<屏幕宽度 左侧分类宽度
- md: 160 # 1024px<屏幕宽度<=1468px 左侧分类宽度
- width:
article_txt: 欢迎在评论区中进行批评指正,转载请注明来源,如涉及侵权,请联系作者删除。
bottom_text: ©2022-2022 pengber
searchAll: true (这个不知道全局搜索怎么开始)
开启此功能需要下面操作:
在 hexo 根目录 执行 npm install hexo-generator-search –save 安装插件
在 hexo 根目录的 _config.xml 中添加下面内容
search:
  path: search.xml
  field: post
word_count: true
npm i hexo-wordcount –save
toc:
max_depth: 4 (因为3-hexo会自动展开所有目录,所以设置为5级不太好)highlight: (还需要关闭hexo的_config.yml下面的hightlight)
on: truemathjax: (必须两个全部设置为true才能渲染)
on: true
per_page: truemermaid
npm install hexo-filter-mermaid-diagrams –save
comment:
on: true
type: utterance
comment_count: falseutterance: (下面这个label要和安装utteranc时填写的label一样), utteance安装配置
这里需要在github页面安装一下utteranc, 详情点击上面的配置)
repo: pengber/pengber.github.io
label: comment
其他
替换3-hexo\sourse\img下的头像, 微信收款码, 支付宝收款码
hexo config
- title: pengber’s site
- author: pengber
- theme: 3-hexo
- deploy:
type: git
repository: git@github.com:pengber/pengber.github.io.git
branch: main - search:
path: search.xml
field: post - tags: C++, python, Java, PHP, WAMP, github, pytorch
- permalink_pinyin:
enable: true
separator: ‘-‘ # default: ‘-‘ - githubEmojis:
enable: true
className: github-emoji
inject: true
styles:
customEmojis:
自己需要安装的插件
- hexo-enhancer (生成分类和文章题目, 利用文章题目覆盖创建时间)
自己fork了hexo-enhancer改变了文章题目的正则表达式 - hexo-blog-encrypt(对博客进行密码加密)
- hexo-wordcount(主题中需要配置)
- hexo-permalink-pinyin
- hexo-filter-github-emojis
- hexo-filter-mermaid-diagrams(主题需要配置)
十.首页和关于
参考3-hexo首页配置和 3-hexo使用说明开启关于页面
首页位置是themes\3-hexo\layout/indexs.md , 我先将其写在了生活知识下面, 然后再复制过去, 并且要注意, indexs的图片路径要直接写图床的路径, 因为/scripts/下面的脚本只能替换source/_post下面的图片路径为远程图床路径
关于位置是source/aoubt/index.md, 得首先用命令hexo new page "about"创建页面, 然后添加index.md, 然后修改主题的config.xml的about为true.
十一.脚本
脚本需要在根目录下面建立scripts文件夹, 我现在在里面放了一个脚本用于替换本地图床路径为远程图床路径.
十二.写作
利用typora写作, 图片的话会首先复制到本地, 之后由本人控制是否需要上传.
十三.发布⭐
在github上面建立
pengber_site私有仓库, 然后将本地的pengber.github.iogit init git add . git commit -m "update" git branch -M main git remote add origin git@github.com:pengber/pengber_site.git git push -u origin master将多个命令写成批处理程序(异常记录——bat批处理闪退, 通过bat发布)放置在
pengber.github.io\hd.bat中, 以后的话可以写完之后点击此批处理程序就可以发布并且推送到hexo clean | hexo g | hexo d pause这样的话
hexo的三个命令会用config.yml中的发布配置发布静态博客到pengber.github.io这个仓库,然后
git的三个命令会将该文件夹所有文件都发布到pengber_site这个私有仓库, 里面的有md原始文件.git add . git commit -m "update" git push在图床
D:\pic-bed下面执行一下命令(不知道为什么不能执行bat)git add . git commit -m "update" git push
参考
[^4]:免费的个人博客系统搭建及部署解决方案(Hugo + GitHub Pages + Cusdis)
[^5]:通过 GitHub Actions 实现私有仓库的免费 Github Pages 部署
其他-七牛云做图床(废弃,已经用github做图床)
实现功能:
- 可以批量上传现有图片
- 设置picgo自动上传, 搭配typora的话可以以后使用图片时直接上传至七牛云图床并且使用图床链接.
- 因为不能一次性下载所有图片, 所以七牛云图床方案已经被我弃用, 而使用github图床.
注册认证七牛云
密码注册, 需要用微信实名认证.
创建七牛云存储空间
映射自己已备案的域名到七牛云存储空间
这里需要准备一个备案过的域名, 要求还是非常高的, 备案过的域名意味着你有自己的空间.
上传本地所有图片到七牛云存储空间
这一步可以选择本地所有图片上传, 没出什么岔子

设置picgo的七牛云图床

其中, 存储区域为华东 z0,华北 z1,华南 z2,北美 na0,东南亚 as0
其他-hexo主题需求分析及比较
博客需求(基本是typora的在线版本):
- 最重要的需求是博客分为3栏, 左栏为文章分类, 需要支持多级分类, 中间栏为正文, 一栏为文章大纲, 类似于typora, 分类最好可以显示文件数量
- 可以利用时间线归档, 时间线以年为分级, 并且可以折叠打开.
- 可以搜索内容
首页, 分类, 归档, 关于, 搜索为页面顶部
寻找的比较符合需求的博客:
Wikitten(最终选择)
作者主页: https://wiki.zthxxx.me/wiki/%E7%94%9F%E6%B4%BB%E5%AD%A6%E4%B9%A0/%E7%82%B9%E6%BB%B4%E4%BA%BA%E7%94%9F%E8%A7%82%E5%BF%B5%E4%BF%A1%E6%9D%A1/3-hexo(重点推荐)
作者主页: https://yelog.org/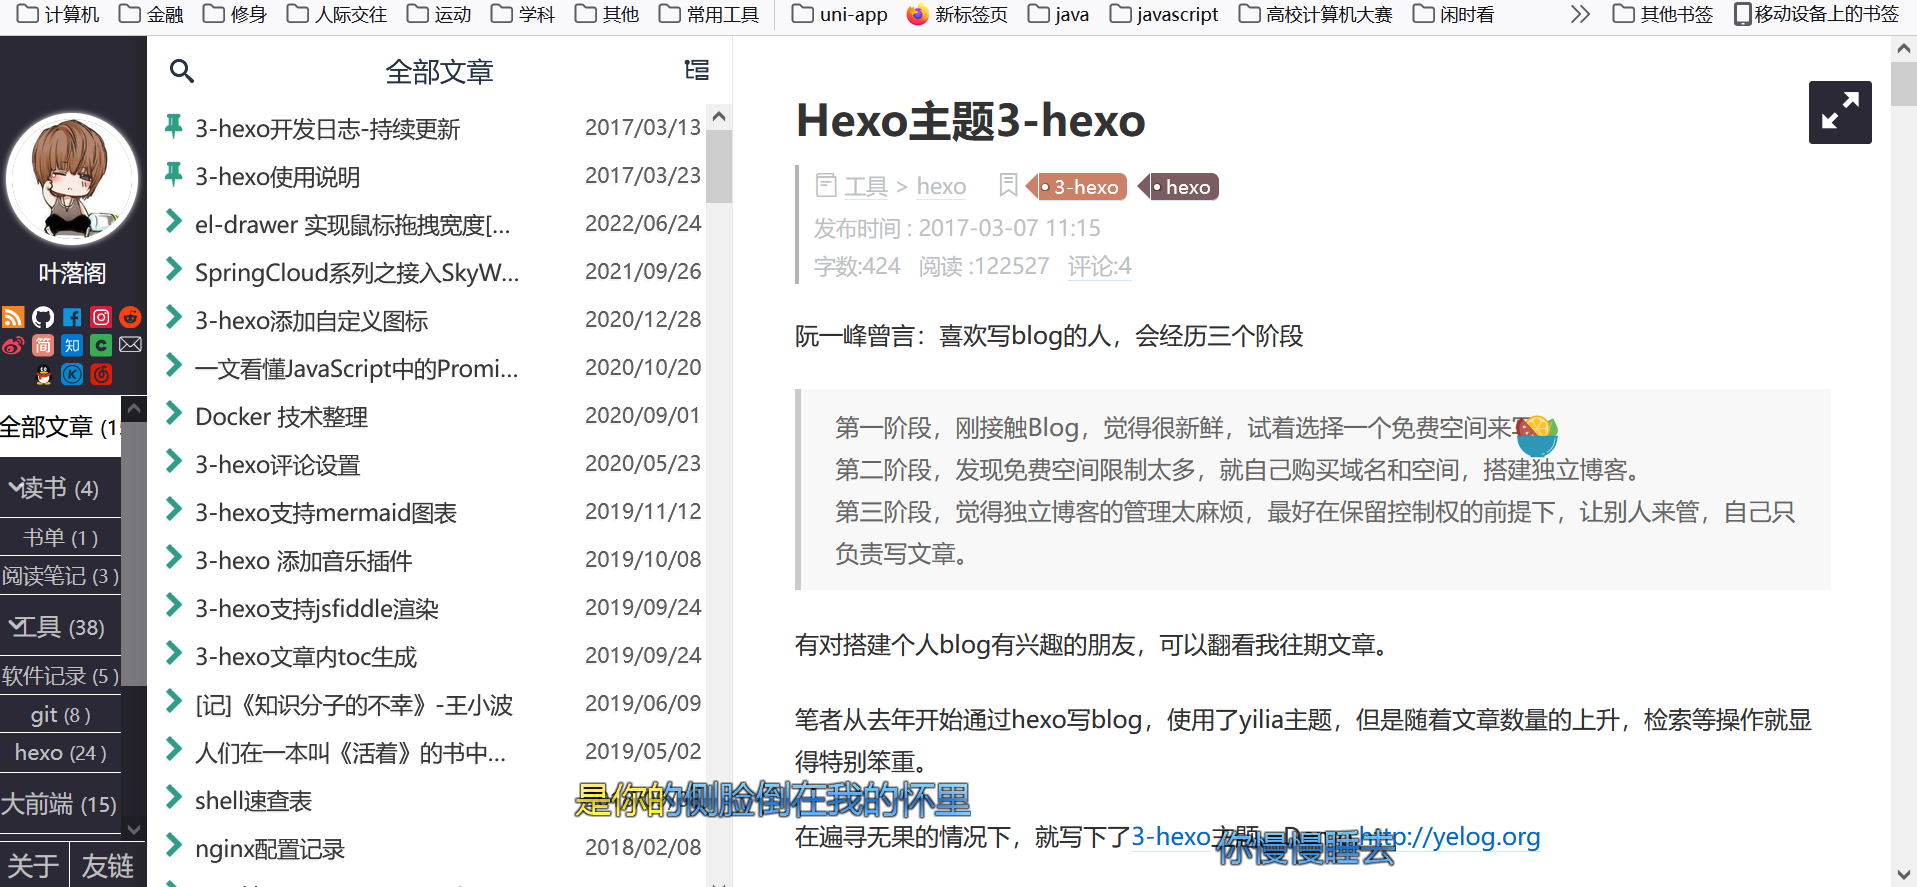
next 这个人用的特别多, 不过我觉得一般
vuepress 可以用这个构建自己主题
其他-hexo常用插件
npm i -S hexo-renderer-marked hexo-enchancer
hexo-renderer-marked(推荐)
可以支持某种类型的markdown语法, wikktten已添加并且设置为github的markdown语法.
功能
安装
npm install hexo-renderer-marked --save
配置
在hexo的_config.yml中添加
marked:
  gfm: true
  pedantic: false
  breaks: true
  smartLists: true
  smartypants: true
  quotes: '“”‘’'
  modifyAnchors: 0
  anchorAlias: false
  autolink: true
  mangle: true
  sanitizeUrl: false
  dompurify: false
  headerIds: true
  lazyload: false
  prependRoot: true
  postAsset: false
  external_link:
    enable: false
    exclude: []
    nofollow: false
  disableNunjucks: false
  descriptionLists: true
hexo-enhancer(推荐)
功能
此插件支持的功能较多,并且未来会继续增加,可以理解为插件包。到目前为止,此插件支持的功能如下:
- 自动生成
title:根据文件名自动生成标题。 - 自动生成
date:根据文件名自动生成日期(它是需要自己手动将日期写到文件名中然后解析),具体策略类似Jekyll。 - 自动生成
abbrlink:根据标题进行base32和crc32生成短链接。 - 自动生成
categories:根据文件的路径解析文章所属分类。 - 自动生成
tags:根据配置在_config.yml中的可用tags和keywords自动扫描文章中出现的标签。
安装
npm install hexo-enhancer --save
配置
修改插件下的
util.js中的re从/^.?(\d{4})[-_]?(\d{2})[-_]?(\d{2}).?[-_.@# ]*(.*)$/
到/^(.*)[-_.@# ]*.?(\d{4})[-_]?(\d{2})[-_]?(\d{2}).?$/.match相关代码改动如下:
date = toMoment(`${match[2]}-${match[3]}-${match[4]}`);
title = match[1].substring(0,match[1].length-1);
我fork了这个项目
hexo-encrypt(不推荐)^9
hexo对部分博文加密
个人感觉它比较侧重于图床部分的加密, 不是很好用.
hexo-blog-encrypt (推荐)
功能
- 可以文章信息头设置
password字段后直接加密 - 可以按标签进行加密, 信息头的
- 如果自己设置了
TOC的话需要更改一下模板代码 - 可以禁用
LOG功能, 也就是hexo g的时候不显示INFO hexo-blog-encrypt: encrypting "{Blog Name}" based on Tag: "EncryptedTag"
安装
npm install --save hexo-blog-encrypt
配置
使用
在每篇文章头加:
password: 密码
然后紧跟文章正文, 注意密码和冒号之间有个空格, 不知道什么原因如果不加空格/不紧跟文章正文/不开启https的时候可能出现没加密的情况.
hexo-submit-urls-to-search-engine(推荐我没安装)
Hexo插件:主动推送Hexo博客新链接至谷歌必应百度搜索引擎,提升网站收录质量和速度. 有点麻烦, 不想配置了.
功能
安装
配置
hexo-prism-plugin(不推荐)^9
代码高亮
功能
使用前hexo的默认代码高亮为:
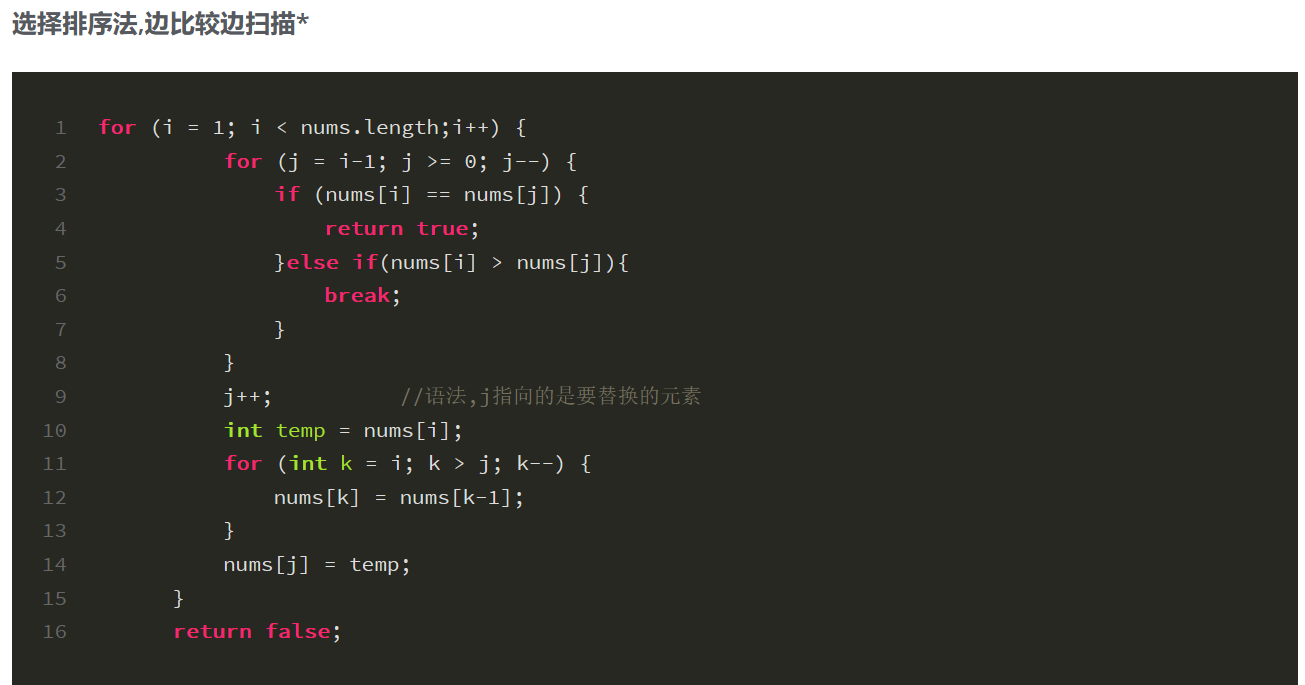
使用后的:
感觉不如使用前的….
安装
npm i -S hexo-prism-plugin
配置
Firstly, you should edit your _config.yml by adding following configuration.
prism_plugin:
  mode: 'preprocess'    # realtime/preprocess
  theme: 'default'
  line_number: false    # default false
  custom_css: 'path/to/your/custom.css'     # optional
After that, check highlight option in _config.yml. Make sure that default code highlight plugin is disabled.
highlight:
  enable: false
hexo-wordcount(推荐)^10
功能
文章字数统计
安装
npm i --save hexo-wordcount
配置
然后只需在本主题下的 _config.yml 文件中,将各个文章字数相关的配置激活即可:
(此处注意源文档的 postInfo 是错的,应该为 post_wordcount
post_wordcount:
  date: true # 发布日期
  update: true # 更新日期
  wordCount: true # 文章字数统计
  totalCount: true # 站点总文章字数
  min2read: true # 文章阅读时长
  readCount: true # 文章阅读次数
然后需要在artical.ejs添加如下代码
代码:
<div>
    <span class="post-count">文章字数:<%= wordcount(post.content) %></span>
    <span class="post-count">阅读时间:<%= min2read(post.content) %>min</span>
    <span class="post-count">网站总字数:<%= totalcount(site) %></span>
</div>
路径和代码位置如下:
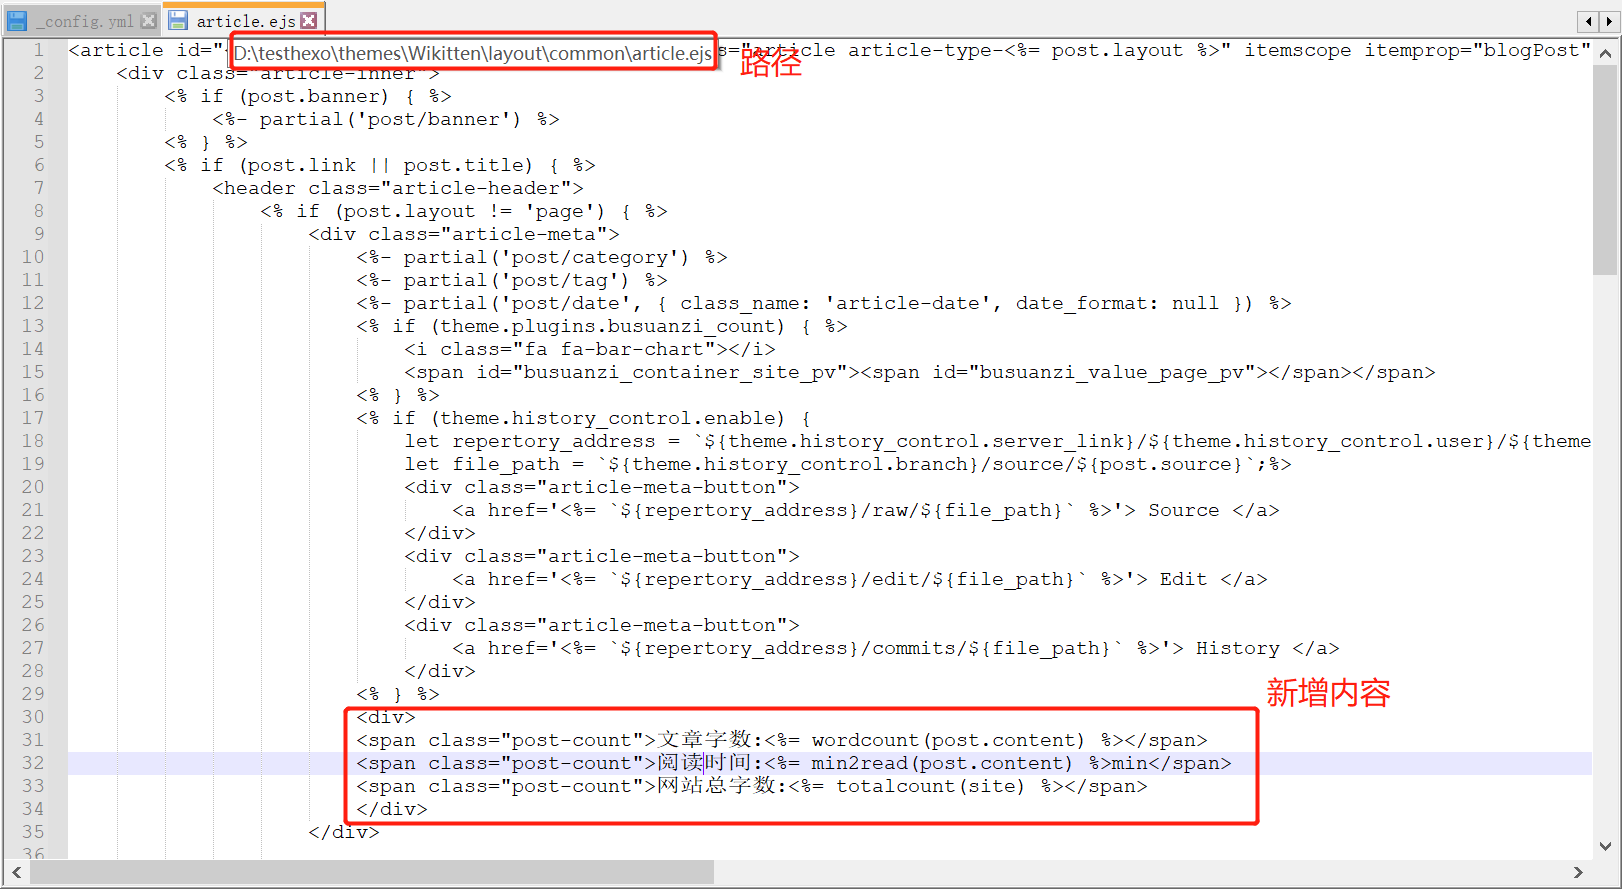
页面效果如图:
hexo-permalink-pinyin(推荐) ^10
功能
如果你的文章名称是中文的,那么 Hexo 默认生成的永久链接也会有中文,这样不利于 SEO,且 gitment 评论对中文链接也不支持。
Hexo 插件使在生成文章时生成中文拼音的永久链接。
安装
npm i hexo-permalink-pinyin --save
配置
Add configuration in _config.yml
# https://github.com/viko16/hexo-permalink-pinyin
permalink_pinyin:
  enable: true
  separator: '-' # default: '-'
hexo-filter-github-emojis(推荐) ^10
功能
支持形如:alarm_clock: ⏰这种emoji.
安装
npm install hexo-filter-github-emojis --save
配置
默认配置
githubEmojis:
  enable: true
  className: github-emoji
  inject: true
  styles:
  customEmojis:
hexo-filter-flowchart(推荐)
功能
使用这个插件可以很方便的用 markdown 画出流程图,由于我使用的 markdown 编辑器是**Typora,内部集成了 flowcharts.js 文档,可以使用其画出流程图,对于需要将这些通过 Typora 画出的流程图上传到网站上并能正常显示,就需要使用hexo-filter-flowchart**这个插件了。
但是我在typora中用的是meraid
安装
npm install --save hexo-filter-flowchart
配置
在hexo的_config.yml中添加:
flowchart:
  # raphael:   # optional, the source url of raphael.js
  # flowchart: # optional, the source url of flowchart.js
  options: # options used for `drawSVG
hexo-filter-mermaid-diagrams(推荐)
功能:
使用mermaid画流程图
安装
npm install hexo-filter-mermaid-diagrams
配置
在主题下面的_config.yml添加:
# mermaid chart
mermaid: ## mermaid url https://github.com/knsv/mermaid
  enable: true  # default true
  version: "7.1.2" # default v7.1.2
  options:  # find more api options from https://github.com/knsv/mermaid/blob/master/src/mermaidAPI.js
    #startOnload: true  // default true
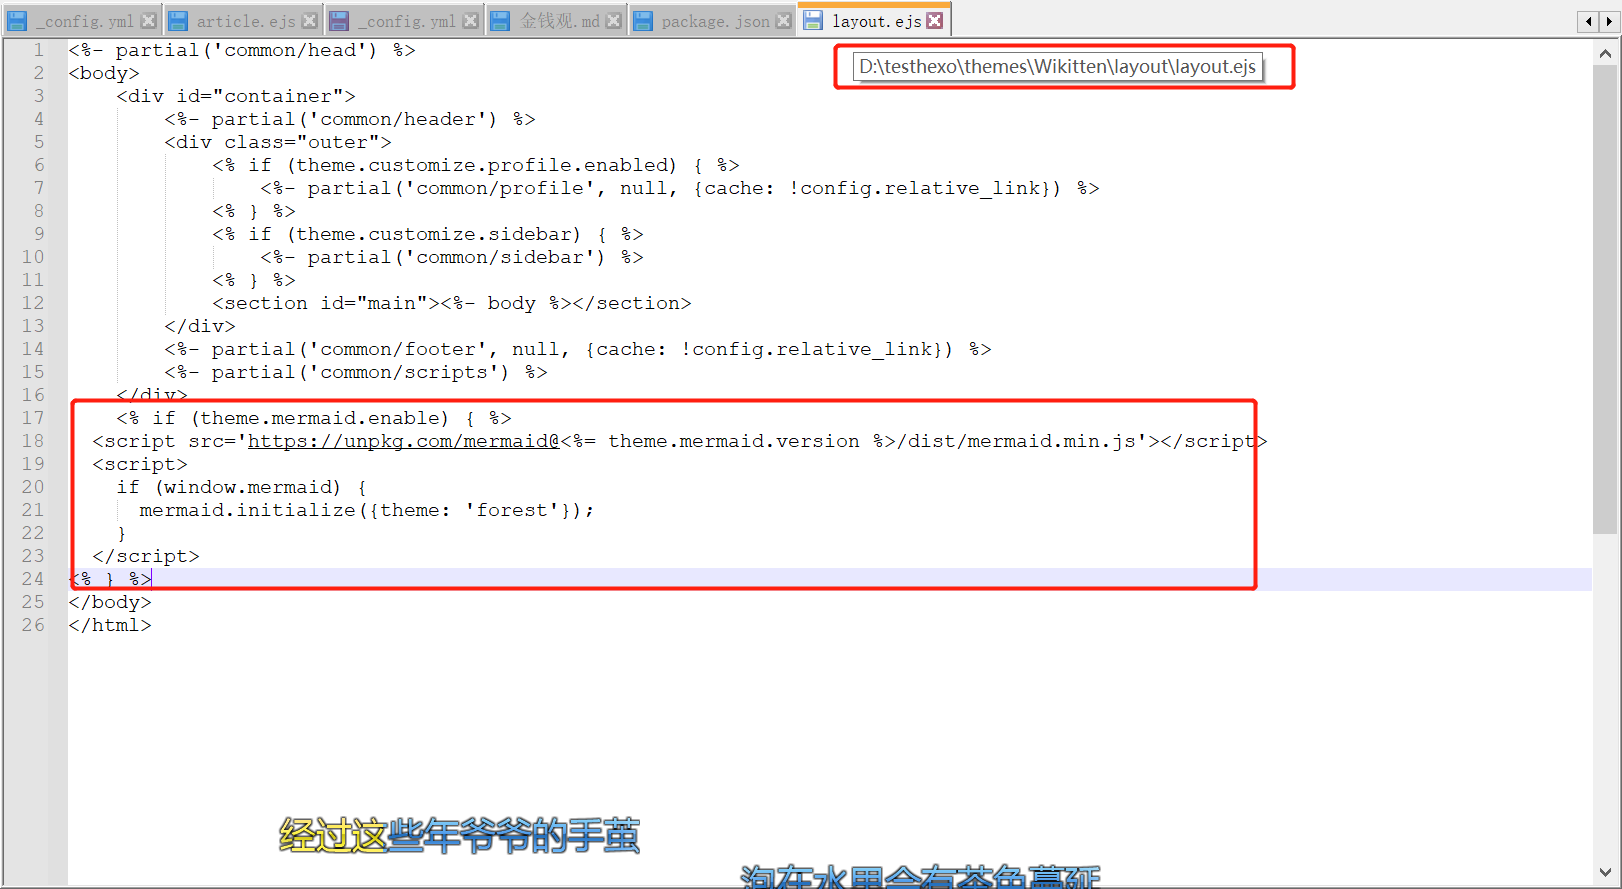
还需要在after-footer.ejs(我的主题wikktten没有该文件, 我就直接增加在了layout.ejs下面了)下面增加如下代码:
        <% if (theme.mermaid.enable) { %>
            <script src='https://unpkg.com/mermaid@<%= theme.mermaid.version %>/dist/mermaid.min.js'></script>
            <script>
                if (window.mermaid) {
                mermaid.initialize({theme: 'forest'});
                }
            </script>
        <% } %>
如图
效果(文本内容会被渲染成下面流程图):
<pre class="mermaid">graph LR
源文件-->预编译
预编译-->编译
编译-->汇编
汇编-->链接
链接-->可执行文件</pre>

hexo-filter-img-url-changer(推荐)
功能
替换某个字符串为另一个字符串, 用于本地图床和网络图床链接的更换
BUG
不知道为什么用不了了, 暂且搁置
hexo-generator-topindex(推荐)
功能
设置文章置顶
安装
npm install hexo-generator-topindex --save
配置
无需配置, 使用时在front-matter内加入top: 1字段, 数字越大越靠前
utterances (推荐)
gitment和gittalk似乎有安全问题
utterances似乎安全性好一点
https://zhuanlan.zhihu.com/p/76237379
其他-思考
- 如果用文件系统自身的创建日期作为博客的日期, 是否正确, 面临的问题就是, 我可能复制了这些文件, 然后复制的日期是新文件的创建日期, 我如果想更改的话怎么更改?
我认为可以这样, 首先采用自动用文件系统作为创建日期, 然后想自动设置的话, 设置文件名为-title-20220901的这种格式, 在使用创建日期后再用该文件名解析再覆盖一次. - 如果安装了
hexo-directory-category和hexo-enhancer的话, 会生成这样的目录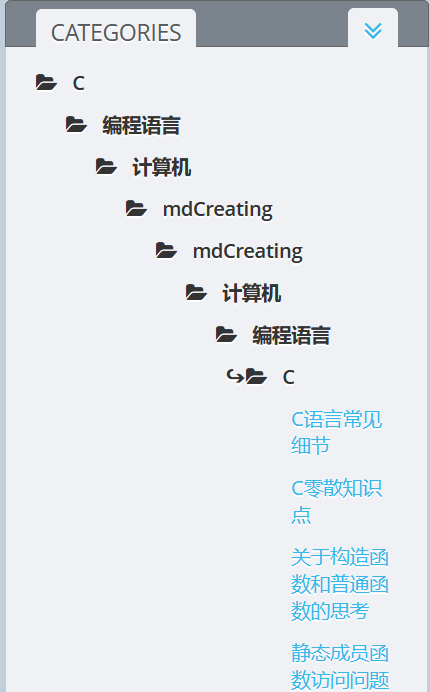 `hexo-directory-category`是直接把目录结构写在了`front-matter`中, 如果把`hexo-directory-category`卸载并且删除生成的`front-matter`的话, `hexo-enhancer`好像没有写入`front-matter`但会解析目录, 如果把`front-matter`删除后再只用`hexo-enhancer`解析目录还是会解析出错, 不过它的title可以解析正确.
 - 需要一个删除
front-matter的功能.
利用notepad++的替换功能替换正则表达式为---\n.*\n---为空即可.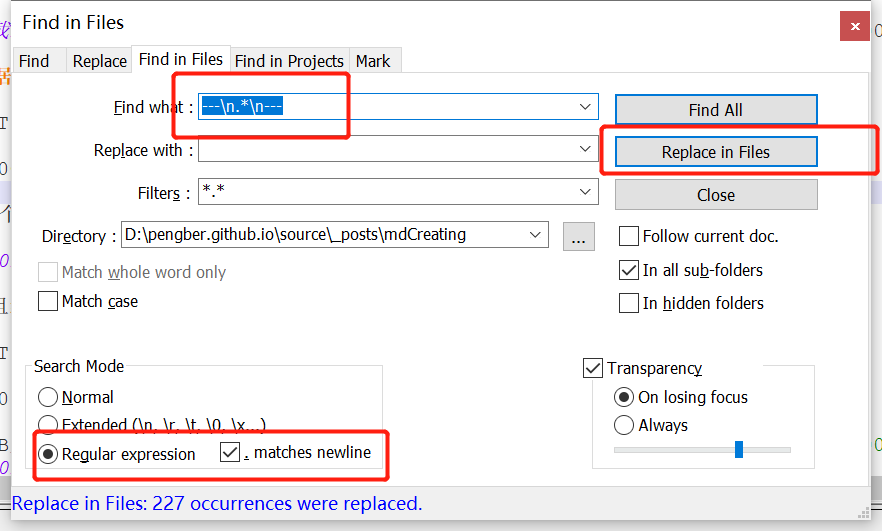
- 对于有些插件会需要
front-matter的信息, 这意味着我们的所有改写front-matter的插件应该是如果有front-matter, 则更新自己插件所需要的key-value信息, 而如果没有, 则创建front-matter, 而不是直接生成front-matter然后覆盖. - 使用加密还是隐藏?
我觉得使用加密好, 加密意味着你可以在任何终端上输入密码在线浏览, 但是隐藏的话就不能云端浏览了. - 对目录进行加密(给目录打tags=encrypted)的功能
其他-命令
复制以下命令到命令行可以直接执行所有命令
hexo clean
hexo g
hexo s
hexo s
//可以更新npm包
npm update
// 可以查看npm包列表
npm list
其他-编写hexo插件
需求
需要每次发布时将本地图床路径替换成网络图床路径.
初始化npm项目
建立hexo-filter-img-url-changer文件夹
执行npm int命令, 执行后有一些参数需要输入, 比如版本号, 包描述等
创建本地仓库
git init
编写代码
一个hexo项目的核心文件有两个, 一个是package.json, 指明包的信息和程序入口, 一个是index.js程序执行入口, 我的index代码如下:
var img_url_changer = function(data){
    // User configuration
    const { config } = this;

    var local_img_path = config.uml_changer.local_img_path;
    var pic_bed_path = config.uml_changer.pic_bed_path;

    data.content = data.content.replace(local_img_path, pic_bed_path);

    return data;
};


hexo.extend.filter.register('before_post_render', img_url_changer);
package.json如下:
{
  "_from": "hexo-filter-img-url-changer@1.0.0",
  "_id": "hexo-filter-img-url-changer@1.0.0",
  "_inBundle": false,
  "_integrity": "sha512-2FXiXufy1Cuu4a8pwPyOb+PtCXvadznZlXA9PeSqgM0ncJO9uplrKdtzoDErS+OyCgwnmwO0o5IN4geHVRZ5ZQ==",
  "_location": "/hexo-filter-img-url-changer",
  "_phantomChildren": {},
  "_requested": {
    "type": "version",
    "registry": true,
    "raw": "hexo-filter-img-url-changer@1.0.0",
    "name": "hexo-filter-img-url-changer",
    "escapedName": "hexo-filter-img-url-changer",
    "rawSpec": "1.0.0",
    "saveSpec": null,
    "fetchSpec": "1.0.0"
  },
  "_requiredBy": [
    "#USER",
    "/"
  ],
  "_resolved": "https://registry.npmjs.org/hexo-filter-img-url-changer/-/hexo-filter-img-url-changer-1.0.0.tgz",
  "_shasum": "b750ca2e46e304027b3ef596079cc29c45ea3ee7",
  "_spec": "hexo-filter-img-url-changer@1.0.0",
  "_where": "D:\\pengber.github.io2",
  "author": {
    "name": "pengber"
  },
  "bundleDependencies": false,
  "deprecated": false,
  "description": "a filter of hexo which can change some local file's  string to another string when you deploy like img url",
  "keywords": [
    "hexo",
    "img",
    "url"
  ],
  "license": "ISC",
  "main": "index.js",
  "name": "hexo-filter-img-url-changer",
  "scripts": {
    "test": "echo \"Error: no test specified\" && exit 1"
  },
  "version": "1.0.0"
}
编写readme.md
版本控制和推送远程仓库
git add .
git commit -m
git branch -M main
git remote add origin git@github.com:pengber/hexo-filter-img-url-changer.git
git push -u origin main
发布NPM包市场
创建npm账号
在npm官网创建账号
在本地登陆
执行
npm adduser
后输入昵称和密码以及发送给邮箱的一次性密码
在包路径下发布
在包所在的位置, 比如D:\mycode\javascript\hexo-filter-img-url-changer执行
npm publish
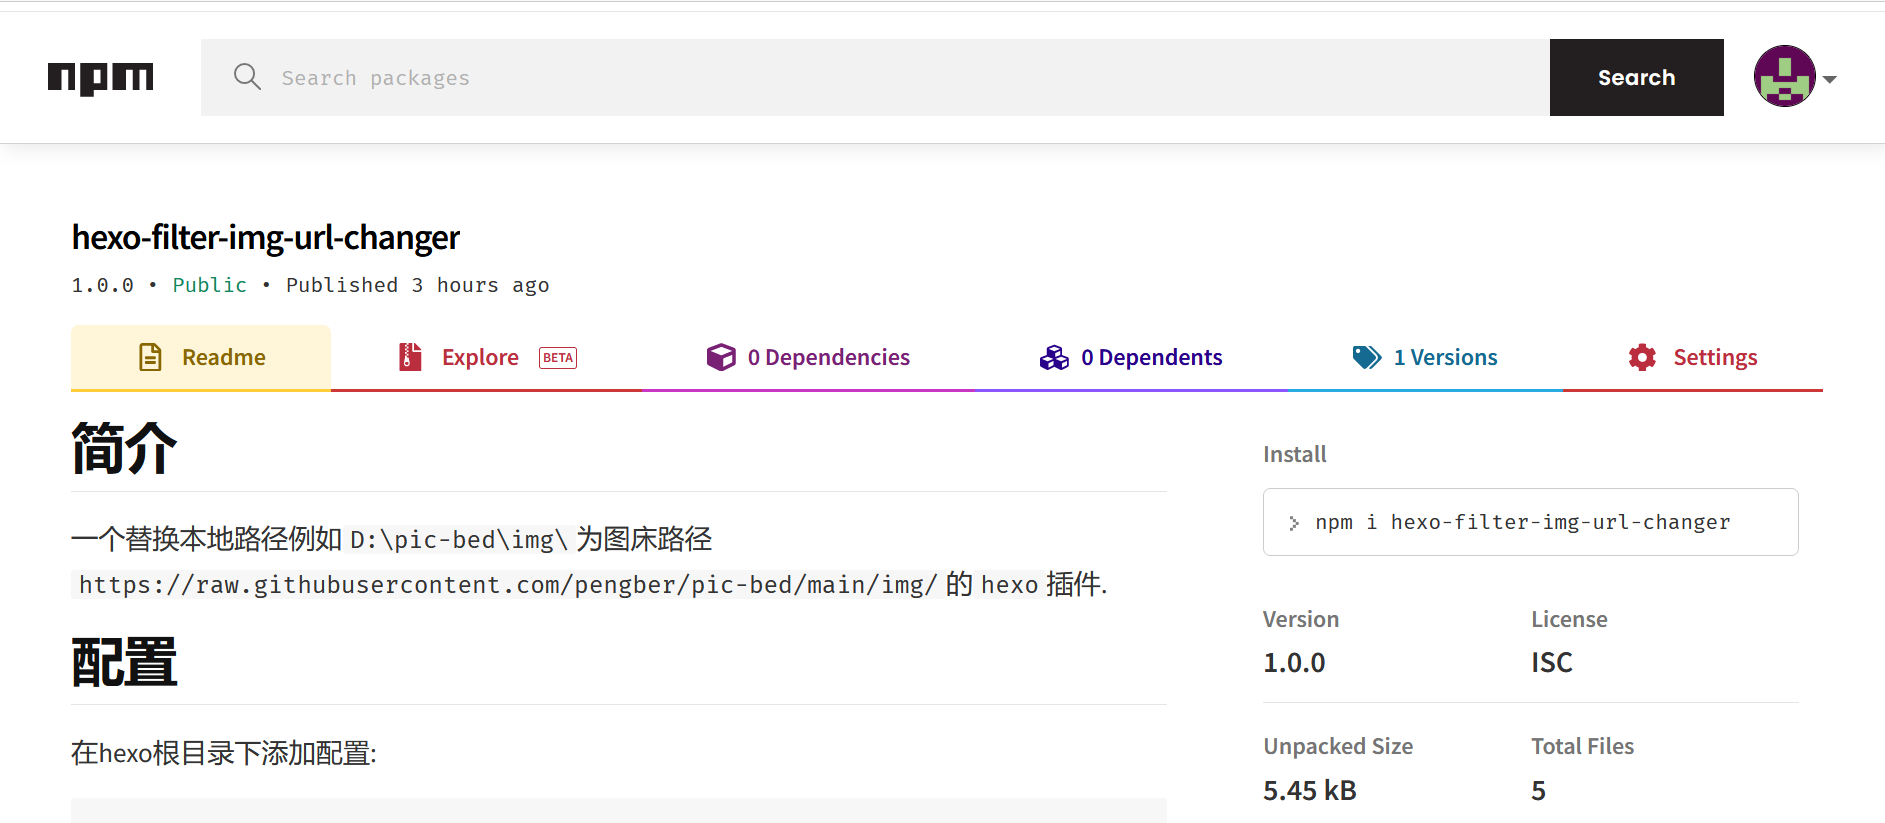
之后就可以在npm官网上搜索到了包了
更新版本再发布
如果需要再发布的话需要更改package.json的版本号再npm publish.
发布到hexo插件网站
forkhexojs/site
把项目复制到本地
$ git clone https://github.com/<username>/site.git
$ cd site
$ npm install
编辑
source/_data/plugins.yml,在档案中新增您的插件,例如:- name: hexo-server description: Server module for Hexo. link: https://github.com/hexojs/hexo-server tags: - official - server - console推送(push)分支
创建一个
pull request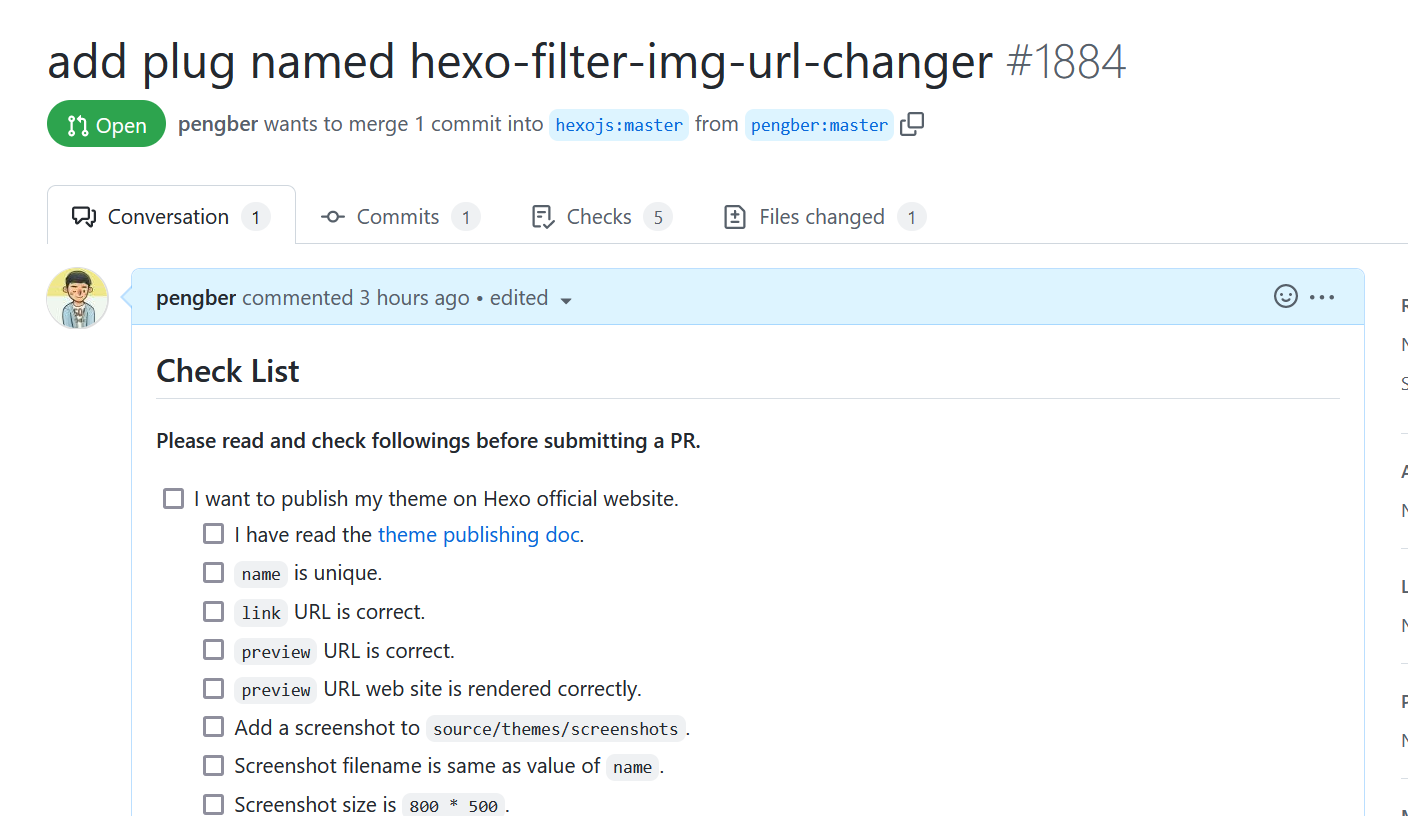
其他-更改hexo-enhancer
TODO
- 修改hexo-filter-image-url-changer
- 增加修改交叉引用的
D:\pengber.github.io\source\_posts\文件目录\文件名.md本地地址为按照hexo命名格式的永久链接
欢迎在评论区中进行批评指正,转载请注明来源,如涉及侵权,请联系作者删除。
